Metal Roofing Installation Guide⁚ A Comprehensive Guide
This comprehensive guide provides a step-by-step approach to metal roofing installation, covering everything from preparation to final inspection. Whether you’re a seasoned professional or a DIY enthusiast, this guide will equip you with the knowledge and techniques needed for a successful installation.
Introduction
Metal roofing has gained immense popularity in recent years, becoming a preferred choice for homeowners seeking a durable, aesthetically pleasing, and environmentally friendly roofing solution. This comprehensive guide aims to provide you with the essential knowledge and practical steps required for a successful metal roof installation. Whether you’re a seasoned professional or a DIY enthusiast embarking on your first metal roofing project, this guide will serve as your trusted companion, guiding you through every stage of the process.
From understanding the fundamentals of metal roofing to selecting the right system, preparing your roof for installation, and meticulously installing the panels and accessories, this guide will equip you with the expertise to achieve a high-quality, long-lasting metal roof. We’ll delve into the intricacies of each step, providing detailed instructions, valuable tips, and safety precautions to ensure a smooth and successful installation.
By the end of this guide, you’ll possess a thorough understanding of metal roofing installation best practices, enabling you to confidently tackle your project with the assurance of a professional outcome. So, let’s embark on this journey together, exploring the world of metal roofing and unlocking the secrets to a successful installation.
Understanding Metal Roofing
Metal roofing offers a compelling blend of durability, longevity, and aesthetic appeal, making it an increasingly popular choice for homeowners. Composed of various metals, including steel, aluminum, copper, and zinc, metal roofs are renowned for their resilience against harsh weather conditions, including high winds, heavy rain, and hail. They are also resistant to fire, insects, and rot, ensuring a long lifespan with minimal maintenance.
Beyond their practical benefits, metal roofs provide a distinct visual appeal, available in a wide range of colors, finishes, and profiles to complement any architectural style. Whether you prefer the sleek modernity of standing seam panels, the classic charm of corrugated sheets, or the rustic allure of shake-style shingles, metal roofing offers a versatile solution for enhancing your home’s curb appeal.
Furthermore, metal roofing contributes to environmental sustainability by being highly recyclable and reflecting solar heat, reducing energy consumption for cooling. With its combination of durability, aesthetics, and environmental benefits, metal roofing presents a compelling choice for discerning homeowners seeking a roofing solution that stands the test of time.
Choosing the Right Metal Roofing System
Selecting the ideal metal roofing system involves careful consideration of various factors to ensure a perfect match for your home and needs. The first step is to determine the type of metal that best suits your budget and aesthetic preferences. Steel, known for its strength and affordability, is a popular choice, while aluminum offers excellent corrosion resistance and lighter weight. Copper and zinc, while pricier, provide exceptional durability and a unique, evolving patina over time.
Next, consider the panel profile, which significantly impacts the roof’s appearance and performance. Standing seam panels, characterized by their sleek, continuous seams, offer a modern aesthetic and excellent weather resistance. Corrugated panels, reminiscent of traditional metal roofs, are known for their strength and cost-effectiveness. Shake-style shingles provide a rustic charm, mimicking the look of traditional wood shingles.
The roof’s pitch and the local climate also play crucial roles in choosing the right metal roofing system. A steeper pitch allows for better water runoff, while a flatter pitch might require additional considerations for drainage. Wind loads, snowfall, and extreme temperatures should be factored in to ensure the chosen system can withstand local weather conditions. Consulting a roofing professional can provide expert guidance in selecting the most appropriate metal roofing system for your specific needs.
Preparing the Roof for Installation
A thorough roof preparation is paramount for a successful metal roofing installation. This crucial step ensures a smooth and secure foundation for the new roof. Begin by inspecting the existing roof structure for any signs of damage, rot, or structural weaknesses. Addressing these issues before installation is vital to prevent future problems. Remove any existing roofing materials, such as shingles or tiles, carefully to avoid damaging the underlying decking. If necessary, replace damaged or worn-out sheathing to ensure a solid base for the new metal roof.
Next, focus on the roof’s slope and drainage. Ensure proper slope and drainage to prevent water accumulation and potential leaks. If needed, adjust the slope by adding additional sheathing or using a leveling compound. Inspect and clean gutters and downspouts to ensure proper water flow. A clean roof surface is essential for optimal adhesion and a seamless installation. Remove any debris, dirt, or loose objects from the roof to create a clean canvas for the new metal roofing.
Finally, consider the underlayment. Depending on the climate and the chosen metal roofing system, an underlayment might be necessary to provide additional protection against moisture and wind. Felt, self-adhering membranes, or synthetic sheets are common underlayment options. Properly installing the underlayment creates a moisture barrier and contributes to a long-lasting, weather-resistant roof.
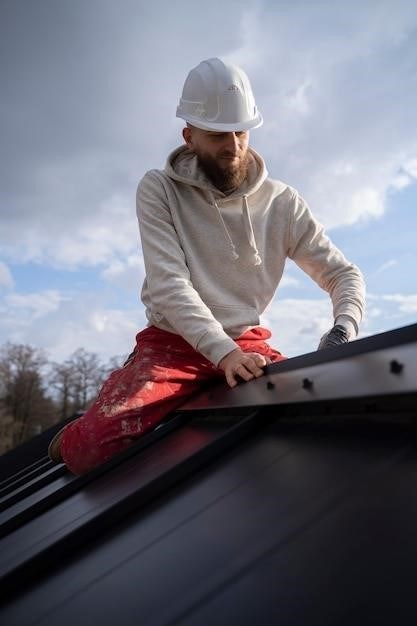
Installing the Metal Roof Panels
Installing the metal roof panels is a meticulous process that requires precision and attention to detail. Start by carefully measuring and cutting the panels to fit the specific dimensions of the roof. Ensure that the cuts are clean and accurate to maintain the integrity of the panels and prevent leaks. When installing the panels, begin at the lowest point of the roof and work your way up. This approach ensures proper drainage and prevents water from pooling on the roof surface.
Secure the panels using appropriate fasteners, typically screws or nails, designed specifically for metal roofing. These fasteners should be long enough to penetrate the sheathing and provide a secure hold. Follow the manufacturer’s recommendations for fastener spacing and installation techniques. During installation, ensure that the panels are aligned correctly, with even gaps between each panel. Avoid any overlapping of panels, as this could lead to leaks or other problems. Maintain a consistent overlap between adjacent panels to ensure proper water flow and prevent any gaps that could allow water to penetrate the roof.
As you work your way up the roof, ensure that each panel is properly fastened and secured before moving on to the next. Regularly check the alignment and fit of the panels to ensure a smooth and consistent installation. With careful planning and attention to detail, you can install metal roof panels efficiently and effectively, creating a durable and long-lasting roof for your home.
Installing Roof Accessories
Roof accessories are essential components that enhance the functionality and aesthetics of a metal roof. These accessories include items such as vents, skylights, and snow guards, each serving a specific purpose. Vent installation is crucial for proper ventilation, preventing moisture buildup and ensuring a healthy roof environment. Skylights provide natural light and ventilation, while snow guards help prevent snow avalanches from the roof, ensuring safety. The installation of these accessories requires careful planning and execution to ensure proper integration with the metal roof system.
When installing roof accessories, it’s important to follow the manufacturer’s instructions for each specific product. These instructions will outline the necessary steps, materials, and tools for a successful installation. Proper sealing and flashing are crucial to prevent leaks and ensure the longevity of the roof. Use high-quality sealant and flashing materials that are compatible with the metal roofing system. Ensure that all seams and joints are properly sealed to prevent water penetration. Careful installation of roof accessories contributes significantly to the overall performance and aesthetics of the metal roof.
After installing the accessories, it’s important to conduct a thorough inspection to ensure that they are properly secured and sealed. Check for any gaps or leaks that may compromise the roof’s integrity. By carefully installing and inspecting roof accessories, you can enhance the functionality, safety, and appearance of your metal roof.
Ridge Vent Installation
Ridge vents play a crucial role in a metal roof system, providing proper ventilation and preventing moisture buildup; Installing them correctly ensures optimal performance and extends the lifespan of your roof. The process involves several key steps, each requiring precision and attention to detail.
Firstly, determine the appropriate ridge vent type for your roof. Low profile or standard ridge vents are common options, each with its own characteristics. The choice depends on the specific metal panel being installed and the manufacturer’s recommendations. Secondly, measure and cut the ridge vent to match the length of your roof ridge. Ensure accurate measurements to avoid gaps or overlaps that could compromise ventilation.
Next, prepare the roof ridge for vent installation. Remove any existing flashing or trim that may obstruct the vent. Ensure a clean and smooth surface for proper adhesion. Secure the ridge vent to the roof using appropriate fasteners, following the manufacturer’s specifications. Use sealant to create a watertight seal around the vent and prevent leaks. Finally, install the vent cover to protect the vent from debris and ensure proper airflow.
Proper ridge vent installation is essential for a healthy and long-lasting metal roof. By following the steps outlined in the manufacturer’s instructions and using high-quality materials, you can ensure optimal ventilation and protect your investment for years to come.
Flashing and Trim Installation
Flashing and trim are essential components of any metal roof system, serving to protect vulnerable areas from water intrusion and enhance the overall aesthetic appeal. Proper installation requires careful attention to detail, ensuring a watertight seal and a seamless integration with the roof panels. The process involves several key steps, each requiring specific techniques and tools.
First, measure and cut the flashing and trim pieces to fit the specific areas they will be installed. Ensure accurate measurements to avoid gaps or overlaps that could compromise water resistance. Next, prepare the surfaces for flashing and trim installation by cleaning them thoroughly and removing any debris or obstructions. This ensures proper adhesion and prevents potential leaks.
Install the flashing and trim pieces using appropriate fasteners, following the manufacturer’s recommendations. Ensure a secure and watertight seal by overlapping the pieces and using sealant around the edges and joints. For critical areas like valleys and roof penetrations, use specialized flashing materials designed to withstand high water pressure. Finally, install the trim pieces to create a clean and finished appearance, hiding the raw edges of the roof panels and enhancing the overall aesthetic.
Proper flashing and trim installation is crucial for a long-lasting and aesthetically pleasing metal roof. By following the steps outlined in the manufacturer’s instructions and using high-quality materials, you can ensure a watertight seal and prevent costly repairs in the future.
Sealant Application
Sealant plays a crucial role in ensuring the longevity and watertight integrity of a metal roof. It creates a durable barrier that prevents leaks and protects the underlying structure from moisture damage. Proper sealant application is essential, requiring careful consideration of the sealant type, application techniques, and environmental conditions. This section provides a comprehensive guide to sealant application, outlining the key steps involved in achieving a successful and long-lasting seal.
First, select the appropriate sealant for the specific application. Consider factors such as the type of metal, environmental conditions, and expected lifespan. Ensure the sealant is compatible with the metal and has a good adhesion rating. Next, prepare the surfaces for sealant application by cleaning them thoroughly. Remove any dirt, debris, or loose materials that could hinder adhesion. It is also recommended to prime the surfaces for optimal bonding.
Apply the sealant using a suitable tool, such as a caulking gun or a brush, ensuring even coverage and a smooth finish. Follow the manufacturer’s recommendations for application thickness and curing time. Avoid excessive application, as this can lead to cracking or peeling. Finally, allow the sealant to cure completely before exposing the roof to water or heavy rain. Regular inspection and maintenance of the sealant are crucial for ensuring its effectiveness over time.
Final Inspection and Cleanup
After the completion of the metal roof installation, a thorough final inspection is crucial to ensure the quality and functionality of the new roofing system. This step involves a meticulous examination of all aspects of the installation, from the panels and fasteners to the flashings and trims. The inspection should be conducted with a keen eye for any potential flaws or defects that could compromise the roof’s integrity and performance.
Inspect the roof for any gaps, misalignments, or loose fasteners. Check the flashings and trims for proper installation and sealing. Verify that all seams are sealed properly and that the roof is watertight. Evaluate the overall appearance of the roof, ensuring a smooth, uniform finish free of any noticeable imperfections. Additionally, inspect the drainage system to ensure it is functioning correctly.
Once the inspection is complete and any necessary repairs are made, proceed with the cleanup process. Remove all debris, tools, and leftover materials from the roof and surrounding area. Dispose of waste materials responsibly, following local regulations. Ensure a clean and safe environment for future maintenance and repairs. A thorough final inspection and cleanup contribute significantly to the longevity and functionality of your new metal roof.