Tekonsha Prodigy P3 Trailer Brake Controller Manual⁚ A Comprehensive Guide
This manual provides a comprehensive guide to using and installing the Tekonsha Prodigy P3 trailer brake controller, one of the most advanced electric trailer brake controllers on the market. It covers key features, compatibility, installation, setup, troubleshooting, and safety precautions, helping you maximize your towing experience.
Introduction
The Tekonsha Prodigy P3 trailer brake controller is a highly sought-after unit that utilizes advanced proportional braking technology to ensure safe and controlled towing. This manual serves as a comprehensive guide, providing step-by-step instructions for installation, setup, and operation.
It will cover key features, benefits, compatibility, and troubleshooting tips, empowering you to confidently use the P3 to enhance your towing experience. The P3’s intuitive design and user-friendly interface make it easy to operate, while its advanced features offer a level of control and customization that surpasses traditional brake controllers. Whether you’re a seasoned towing enthusiast or a first-time trailer owner, this manual will equip you with the knowledge you need to maximize the P3’s capabilities and enjoy a smooth, safe towing journey.
Key Features and Benefits
The Tekonsha Prodigy P3 boasts a range of features that set it apart as a top-tier trailer brake controller. One of its most notable features is its proportional braking system. This advanced technology allows the P3 to sense the tow vehicle’s deceleration and apply the trailer brakes proportionally, resulting in smooth, controlled braking. This eliminates the need for manual adjustments and ensures a consistent braking experience, regardless of the trailer’s load or road conditions. The P3 also features a large, easy-to-read LCD display with multiple color options, providing clear visibility of braking parameters. This display showcases output current, battery/brake/output voltage, and a flashing red warning system for enhanced driver awareness. Additionally, the P3 offers up-front controls for easy access to all its features, simplifying the adjustment process. The P3’s versatility is further enhanced by its compatibility with a wide range of vehicles and trailers, making it a reliable choice for various towing needs.
Compatibility and Applications
The Tekonsha Prodigy P3 boasts impressive compatibility, making it a versatile choice for a wide range of vehicles and trailers. It is compatible with vehicles from various manufacturers, including Ford, GM, Chevy, Dodge, RAM, Toyota, Jeep, and more. This wide compatibility ensures that the P3 can be seamlessly integrated into diverse towing setups. The P3 is designed to handle trailers with 1 to 4 axles, accommodating a variety of trailer sizes and weights. Whether you’re towing a small boat, a large camper, or a heavy-duty trailer, the P3 provides the necessary braking power to ensure safe and controlled towing. Its proportional braking system ensures smooth and responsive braking for all types of trailers, regardless of their weight or braking system. The P3’s adaptability makes it a valuable tool for various towing applications, from weekend getaways to long-distance travel.
Installation Guide
Installing the Tekonsha Prodigy P3 brake controller is a straightforward process that can be accomplished with basic tools and some patience. The installation guide provided with the P3 includes detailed instructions and diagrams to guide you through each step. Before beginning the installation, ensure that you have all the necessary tools and components, including a wire stripper, crimping tool, and the appropriate wiring harness for your vehicle. The P3’s unique connector at the back of the control offers flexibility in wiring options, allowing you to utilize the included pigtail wiring harness or a custom harness specific to your vehicle. The installation process involves mounting the P3 in a location that is easily accessible and visible, such as the dashboard or center console. Once mounted, connect the wiring harness to the P3 and run the wiring to the appropriate points in your vehicle’s electrical system. It is crucial to follow the specific wiring instructions provided in the manual to ensure proper installation and functionality. After completing the wiring, test the P3’s operation by connecting a trailer and activating the brakes.
Mounting the P3
The Tekonsha Prodigy P3 brake controller offers versatility in mounting options, allowing you to choose the location that best suits your needs and vehicle configuration. It can be mounted in various positions within your vehicle’s interior, such as the dashboard, center console, or even under the dash. The key is to select a location where the P3’s display is easily visible and its buttons are within easy reach. This ensures convenient access to the controller’s features and settings while driving. To mount the P3, first, identify the optimal location and ensure that the mounting surface is clean and free of obstructions. The P3 comes with mounting brackets that provide flexibility in positioning. You can use screws or adhesive tape to secure the brackets to the chosen surface. Once the brackets are securely attached, you can then mount the P3 itself to the brackets using the provided hardware. The manual provides detailed diagrams and instructions for mounting the P3, which can be followed to ensure a secure and proper installation. After mounting the P3, take a moment to ensure that the unit is securely mounted and that all connections are tight before proceeding to the next step of the installation process.
Wiring the Brake Control
Connecting the Tekonsha Prodigy P3 brake controller to your vehicle’s electrical system is a crucial step in the installation process. The P3 features a unique connector at the rear, providing flexibility in wiring options. You can choose between using the included pigtail wiring harness or opting for a custom harness specifically designed for your vehicle. If using the pigtail harness, follow the manual’s instructions for connecting the wires to the appropriate terminals on your vehicle’s wiring. This harness typically has wires for power, ground, brake signal, and trailer brake output. Identify each wire and ensure it is connected correctly to avoid malfunctions. For custom harnesses, Tekonsha offers vehicle-specific plug-and-play options that simplify the wiring process. These harnesses are pre-wired to match your vehicle’s electrical system, eliminating the need for individual wire connections. Consult the Tekonsha website or your vehicle’s owner’s manual for compatibility and installation instructions for custom harnesses. Once the wiring is complete, double-check all connections to ensure they are secure and properly routed. The manual provides diagrams and clear instructions to guide you through the wiring process, ensuring a safe and reliable connection. After the wiring is done, it’s a good practice to test the brake controller by applying the brakes with the trailer connected. This will verify that the system is functioning correctly and that the trailer brakes are responding appropriately.
Setting Up and Adjusting the P3

After successfully installing the Tekonsha Prodigy P3, you’ll need to configure it to match your specific towing setup. This involves several steps, ensuring optimal braking performance and a safe towing experience. The P3 features user-friendly controls and a clear LCD display that guides you through the setup process. One of the first steps is to level the sensor. This ensures accurate braking response based on your vehicle’s deceleration. The manual provides detailed instructions on how to achieve proper sensor leveling. Next, select the appropriate brake type for your trailer. The P3 supports various brake types, including electric and hydraulic brakes. Choose the setting that corresponds to your trailer’s brake system. Once the brake type is set, you can adjust the power output to the trailer brakes. This setting determines the intensity of braking force applied to your trailer. The P3 allows you to fine-tune this setting based on the weight of your trailer and your personal preference. The manual provides guidance on finding the optimal power setting for your specific setup. It’s important to test the brake controller’s settings on a safe, controlled surface before towing on public roads. This allows you to familiarize yourself with the brake controller’s response and make any necessary adjustments. The P3 also offers features like manual override, allowing you to manually apply trailer brakes in specific situations. The manual provides a comprehensive overview of these features and their proper use.
Automatic Leveling of the Sensor
The Tekonsha Prodigy P3 incorporates an inertial sensor that automatically levels itself, ensuring accurate braking performance. This sensor plays a crucial role in the P3’s proportional braking system, which adjusts trailer brake output based on your vehicle’s deceleration. To ensure proper sensor leveling, the P3 features an automatic leveling feature that eliminates the need for manual adjustments. When the P3 is first powered on, the sensor automatically levels itself, taking into account the angle of the vehicle’s mounting position. The P3’s LCD display will indicate when the sensor has successfully leveled itself, and the “Level” icon will appear on the screen. The automatic leveling feature ensures consistent and accurate braking response regardless of the vehicle’s mounting angle. This eliminates the need for manual adjustments, simplifying the setup process and ensuring optimal braking performance. The sensor’s automatic leveling feature is a key aspect of the P3’s advanced braking technology, providing a seamless and reliable towing experience.
Setting the Brake Type
The Tekonsha Prodigy P3 allows you to customize the brake type setting to match your trailer’s brake system. This ensures optimal braking performance and prevents potential issues caused by mismatched settings. To set the brake type, navigate to the “Brake Type” menu on the P3’s LCD display. You’ll have several options to choose from, including electric brakes, hydraulic brakes, and air brakes. Select the brake type that corresponds to your trailer’s braking system. The P3 provides a clear and concise description of each brake type, making it easy to understand and select the appropriate setting. Once you’ve selected the correct brake type, the P3 will automatically adjust its braking parameters to match the chosen system. This ensures that the braking force applied to the trailer is optimized for the specific type of brakes installed. Setting the brake type correctly is an important step in maximizing the P3’s braking capabilities and ensuring a safe towing experience.
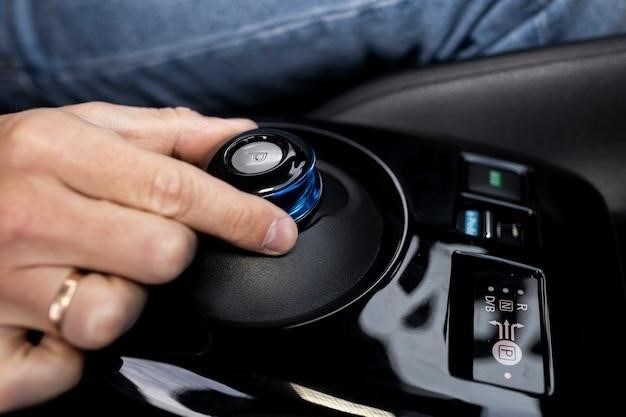
Adjusting the Power to the Brakes
The Tekonsha Prodigy P3 allows you to adjust the power output to the trailer brakes, ensuring safe and controlled braking during towing. This adjustment is crucial for tailoring the braking response to the specific load and conditions. To adjust the power, simply rotate the power knob, located on the P3’s front panel. Turning the knob clockwise increases the braking power, while turning it counterclockwise decreases it. The P3 features a clear LCD display that shows the current power setting, providing visual feedback as you adjust. It’s recommended to start with a lower power setting and gradually increase it as needed, ensuring a smooth and progressive braking experience. The P3’s advanced proportional braking technology automatically adjusts the braking force based on the tow vehicle’s deceleration, providing a seamless and responsive braking experience. Regularly checking and adjusting the power setting ensures optimal braking performance and a safe towing experience.
Troubleshooting and Maintenance
The Tekonsha Prodigy P3 is designed for reliable operation, but occasional troubleshooting and maintenance may be necessary. Common issues include malfunctioning trailer lights, inconsistent braking, or a blank display. For most issues, resetting the P3 by disconnecting the wiring harness and waiting 15 minutes often resolves the problem. If the issue persists, consult the P3’s comprehensive troubleshooting guide, which provides detailed steps and solutions for various scenarios. Regularly inspecting the P3’s wiring and connections ensures proper functionality. Clean any dirt or debris from the unit and its connections to prevent corrosion and maintain optimal performance. Also, check the trailer brake system for any worn or damaged components, ensuring the trailer brakes are in good working order. By following these simple maintenance steps and troubleshooting procedures, you can keep your Tekonsha Prodigy P3 operating smoothly and safely for years to come.
Common Issues and Solutions
The Tekonsha Prodigy P3 is generally a reliable unit, but occasional issues may arise. Here are some common problems and their solutions⁚
- Malfunctioning Trailer Lights⁚ Check the trailer wiring for loose connections, broken wires, or corroded terminals. Ensure the trailer’s fuse is intact and that the trailer light bulbs are working.
- Inconsistent Braking⁚ Ensure the trailer brake system is properly adjusted and that the brake pads or shoes are not worn out. Check for any leaks in the trailer’s hydraulic system. If the issue persists, verify the P3 is correctly calibrated for the trailer’s braking system.
- Blank Display⁚ Reset the P3 by disconnecting the wiring harness and waiting 15 minutes. If the display remains blank, check the vehicle’s fuse for the P3 and ensure the battery connection is secure. If the display still does not function, the P3 may require repair or replacement.
By addressing these common issues promptly, you can maintain the smooth and reliable operation of your Tekonsha Prodigy P3 brake controller.
Resetting the P3
Resetting the Tekonsha Prodigy P3 can be necessary to resolve various issues, such as a blank display, incorrect settings, or unexpected behavior. Here’s how to reset the P3⁚
- Disconnect the Wiring Harness⁚ While the trailer is NOT connected, unplug the wiring harness from the rear of the P3.
- Wait 10-15 Minutes⁚ Allow the P3 to remain disconnected for at least 10 minutes, but ideally 15 minutes, to ensure a complete reset. This allows the unit to clear its internal memory;
- Reconnect the Wiring Harness⁚ After the waiting period, plug the wiring harness back into the P3. The unit should power on and default to its factory settings.
Resetting the P3 should resolve most basic issues. If the problem persists, consult the troubleshooting section of the manual or contact Tekonsha for further assistance.
Maintaining the P3
Proper maintenance ensures your Tekonsha Prodigy P3 trailer brake controller operates reliably and safely. Here are some key maintenance practices⁚
- Regular Cleaning⁚ Keep the P3’s exterior clean by wiping it down with a damp cloth. Avoid using harsh chemicals or abrasive cleaners that could damage the unit. Clean the display screen to ensure optimal visibility.
- Inspect Connections⁚ Periodically check the wiring harness connections at the rear of the P3 and the trailer connector. Ensure the connections are secure and free from corrosion. Tighten any loose connections.
- Check for Damage⁚ Visually inspect the P3 for any signs of damage, such as cracks, scratches, or loose components. If you notice any damage, discontinue use and contact Tekonsha for repair or replacement.
- Update Software⁚ Tekonsha occasionally releases software updates for the P3 to improve performance or address bugs. Check the Tekonsha website for the latest software updates and follow the instructions for updating your unit.
By following these simple maintenance steps, you can help extend the life of your Tekonsha Prodigy P3 and ensure it performs optimally for years to come.